Marvelous Monday Heartfelt Creations

Heartfelt Creations Products Used

Singing in the Rain Paper Collection

HCDP1-286

Instructions

I saw a video for this mini album with directions using dies.  https://youtu.be/mqU6CeM-IPA

http://crealies.blogspot.com/2018/05/mini-album-with-crealies-dies.html 

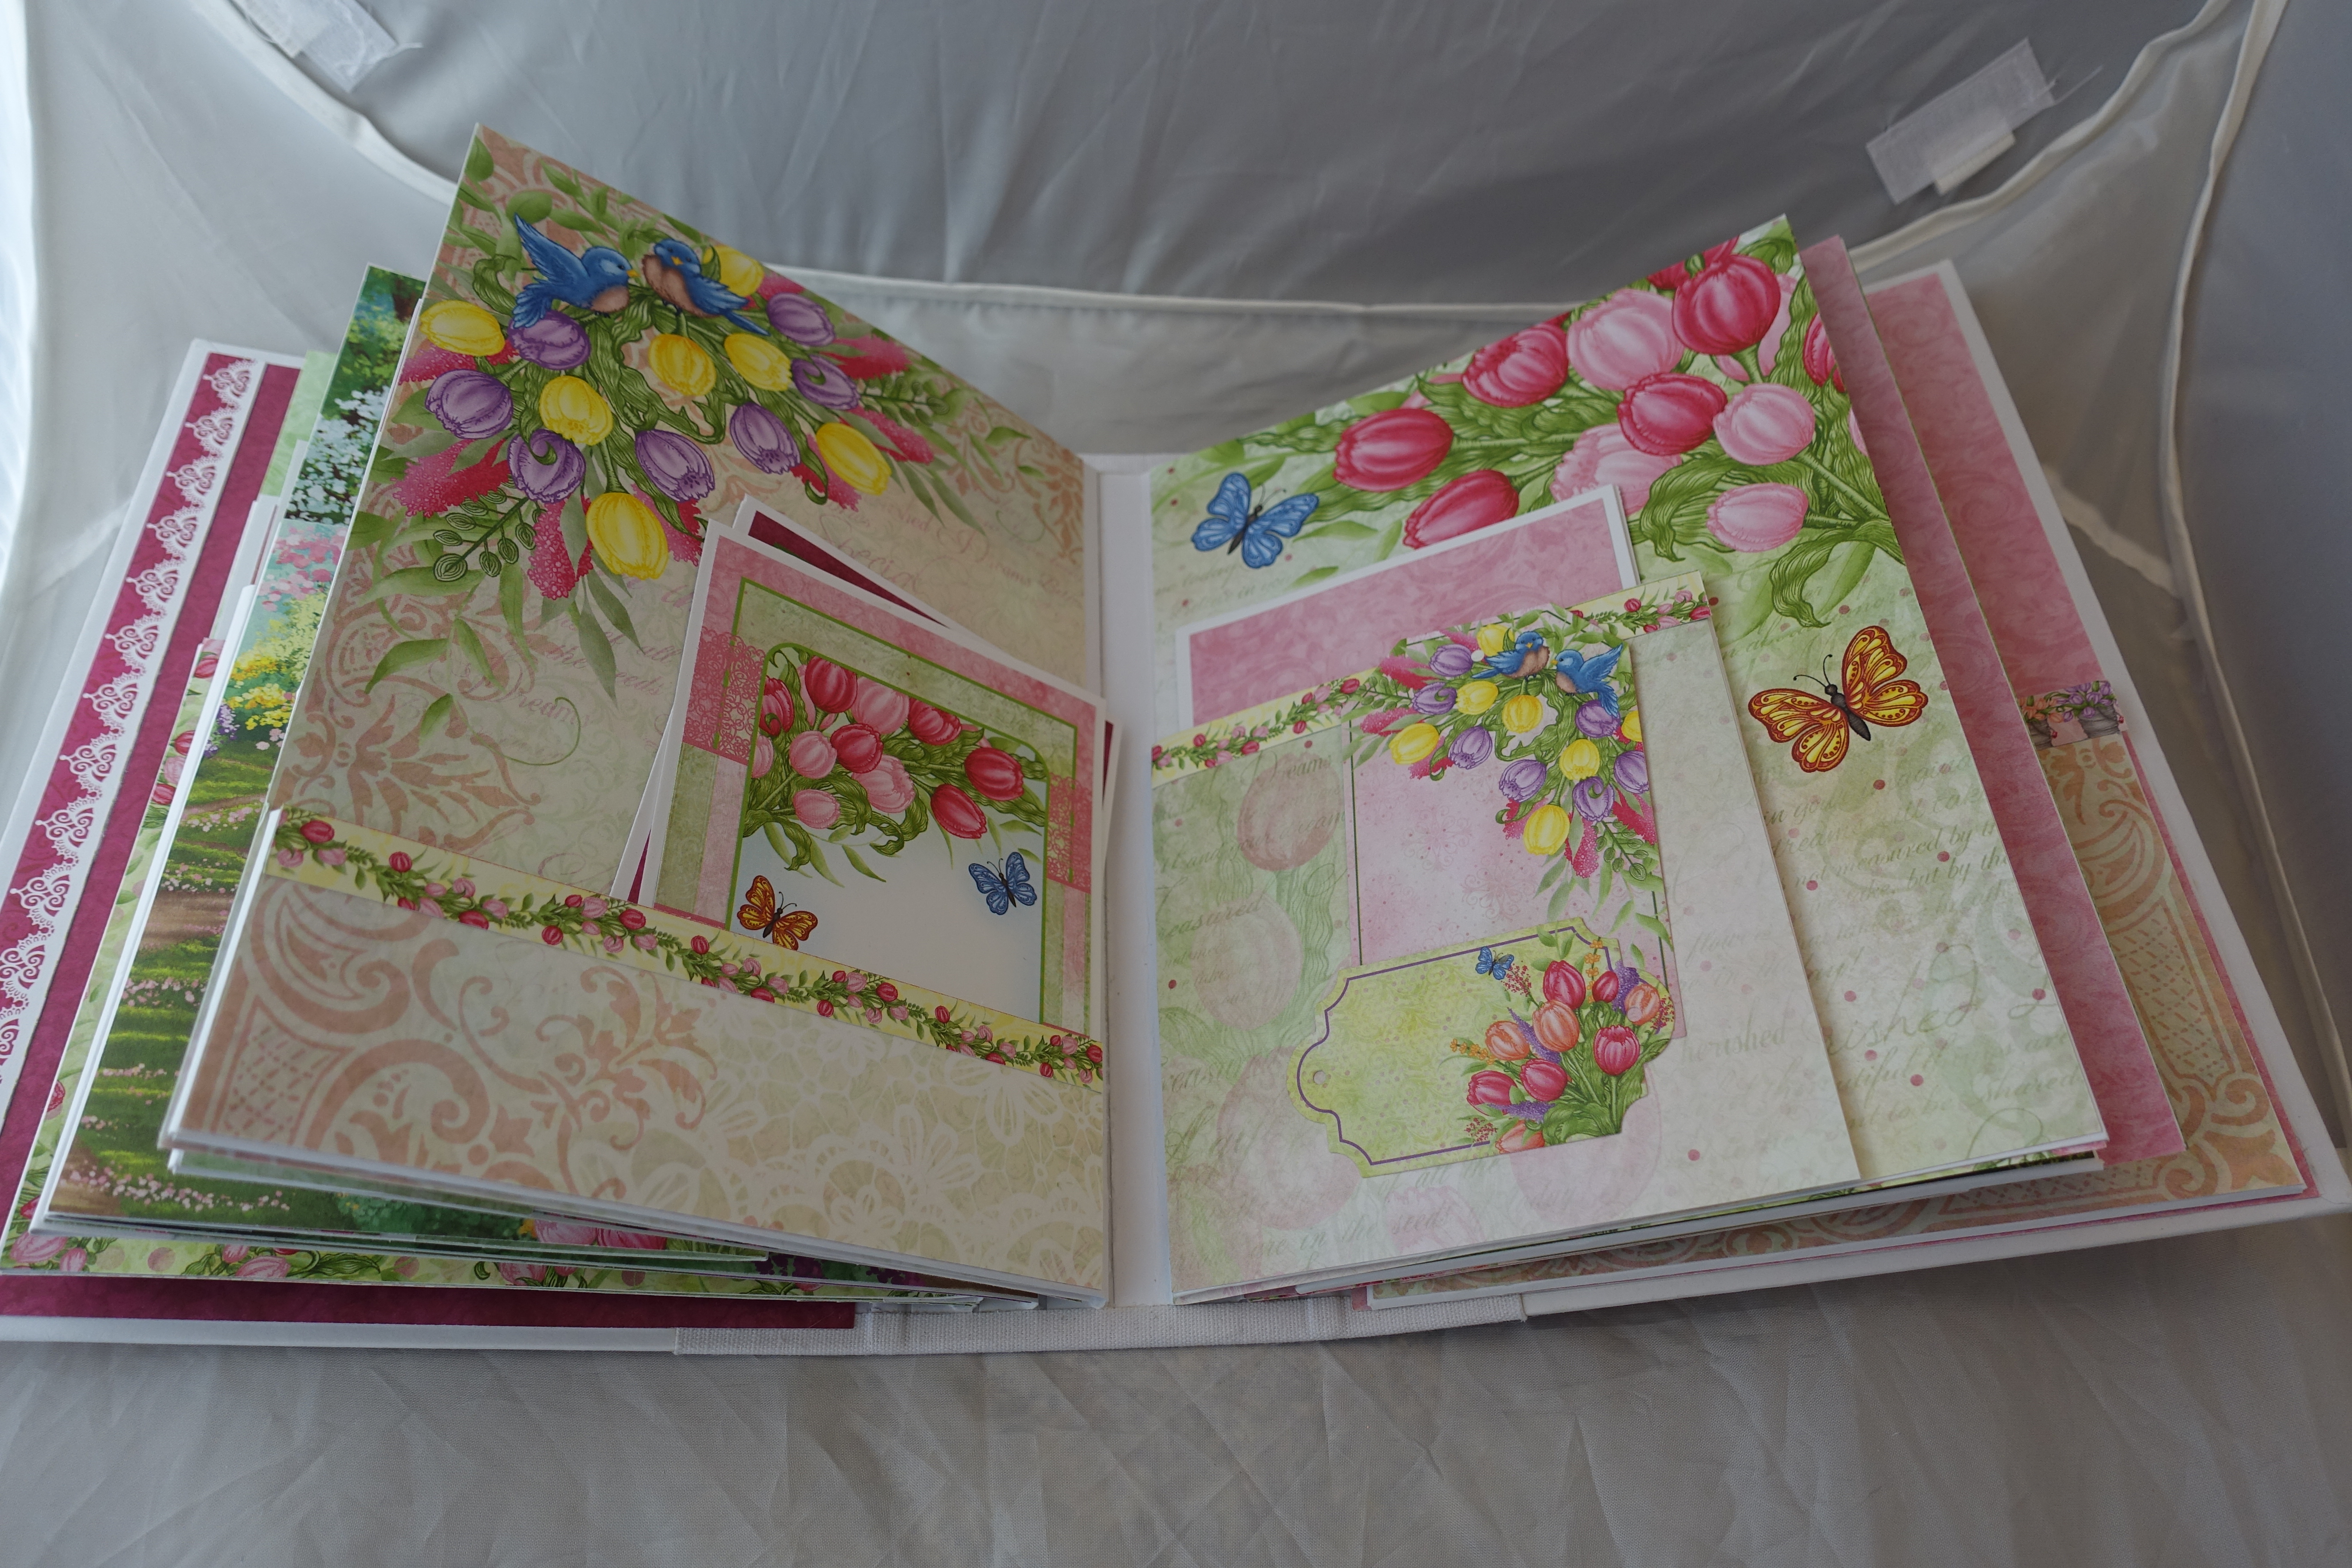
Instead of the use of dies I cut my pages 4 3/4 inches by 6 1/4 inches, and scored base pages on one short side 1/2 inch and on the pull up or pull down pages scored 1/2 inch on one long side. I added 4 1/4 inches by 6 1/4 inches base pages! I did not use any dies for the album. The edge was punched with a zig zag punch! What do you think?

Share Sunday Heartfelt Creations Tulip Time Mini Album

Heartfelt Creations Products Used:

Tulip Time Creative Essentials
HCCE1-644

3D Flipfold Album – White
HCFA1-431

Pocket and Flipfold Inserts A – White
HCFP1-433-2

Pocket and Flipfold Inserts C – White
HCFP1-435-2


In April my sister and I are going on a bucket list trip to the Netherlands including Holland and Belgium. We are going to be there during tulip time and part of the trip includes a river boat for a week! I have my mini album already to add pictures from this upcoming trip. What do you think?

  1. Cut 12 base pages at 6 1/4 inches by 8 1/4 inches to cover the base pages and inside front and inside back cover of the mini album using Tulip Time paper.
  2. Arrange and insert 3D Pocket and Flipfold Inserts A and C on the various pages of the album.
  3. The arrangement of my inserts follow the directions provided in the awesome online Heartfelt Creations class on the “Beginner’s Workshop for Elegant Flipfold Albums at: https://www.heartfeltcreations.us/classes/online/how-to-add-flipfold-inserts-to-my-album

Fabulous Friday Heartfelt Creations Alumni Blog Hop

Welcome to the January 2019 Heartfelt Creations Alumni Blog Hop

Image may contain: text

You should be coming here from

The hop starts at 8 AM EDT on Friday, January 25, 2019 and closes Monday, January 28, 2019  at 11.59 PM EDT. The winner will be announced on the Heartfelt Creations blog and on Facebook on the Wednesday January 30, 2019.
This innovative and perfectly sized coffee table book makes it quick and easy to preserve those precious memories with flip and fold out elements that will add fun and beauty to your project. I bought five of them on Black Friday and already have made two as gifts and one to keep myself. These are the pictures of the one I made for myself with 2018 memories of my two whippets Gina and Blush. Heartfelt Creations has awesome resources including a You Tube video and an online class to provide excellent ideas, specific measurements and materials to complete these types of albums. The blank album comes with the measurement of paper to cut for each page printed right on the album! I followed this tutorial to make this album at: https://www.heartfeltcreations.us/classes/online/insta-album-step-by-step-live-class
What do you think?
Products Used:

Butterfly Dreams Creative Essentials
HCCE1-635

Ornate Pocket Accents Die
HCD1-7214

Ticket and Tags Die
HCD1-7201

Album Tags and Accents Die
HCD1-7202

Decorative Pocket Accents Die
HCD1-7211

Bottle Cap Inc Vintage Magnets 1 Inch – 15 Pack
486491-15

12″ x 12″ Insta-Album – Kraft
HCIA1-470

Be sure to visit all the blogs in the hop and leave a lovely comment as one lucky comment will be randomly selected from a mystery blog to receive a $25 gift certificate to shop with Heartfelt Creations. To claim the prize, the winner will need to contact socialmedia@heartfeltcreations.us with the words January Alumni Blog Hop Winner.

Heartfelt Creations Alumni Blog Flipfold A and C Mini Album

Hello! Welcome to the August 2018 Heartfelt Creations Alumni Team Blog Hop.
Image may contain: text

You should be coming here from

The hop begins at 8AM EST on (August 31, 2018) and runs until 11:59PM EST (September 3, 2018)

I work with a very motivated and fun group of ladies every week making a variety of paper crafting projects. Recently some of them mentioned to me that they were not sure what to do with the albums and flipfold inserts they had purchased. I decided to review The Beginner’s Workshop for Elegant Flipfold Albums: How to Add Flipfold Inserts that Emma Lou from Heartfelt Creations presented as an online class  that is available here: https://www.heartfeltcreations.us/shop/?tracking=5add3e34e7161  The online class provides easy step by steps  through the steps of adding interactive Flipfold & Pocket Inserts A, B, C, D, E, and F to your albums, along with how to add magnet closures. The online class takes the mystery out of these inserts and how easy it is to add Flipfold inserts to your Album, which all differ in design and come pre-measured and pre-scored making assembly quick and stress free, all while allowing varying combinations and designs making your album as unique as you are.

I created three sample albums to use as teaching tools with the ladies . This album showcases Flipfold and Pocket Inserts A and C with retiring Beary Fun Retreat Paper Collection.

. What do you think?


Supplies

Beary Fun Retreat Paper Collection HCDP1-282

3D Flipfold Album – Black HCFA1-430

Pocket and Flipfold Inserts A – Black HCFP1-433-1

Pocket and Flipfold Inserts C – Black HCFP1-435-1

Be sure to visit all the blogs in the hop and leave a lovely comment as one lucky comment will be randomly selected from a mystery blog to receive a $25 gift certificate to shop with Heartfelt Creations. To claim the prize, the winner will need to contact socialmedia@heartfeltcreations.us with the words August Alumni Blog Hop Winner.


Share Sunday Simple Stories Mini Album

I used one 12 x 12 Simple Stories Pumpkin Spice paper pack and project life notebook to make the mini album. This album can be used for journalism and pictures all autumn season. What do you think?

Special Sunday Stampin Up Share What You Love Mini Album

This is a super easy mini album made from four sheets of 12 inches x 12 inches designer series paper and will hold 50 – 60 photos! Take four sheets of 12 inches x 12 inches paper and score at 6 inches. Turn 90 degrees and score at 3 inches. Fold up the 3 inches score piece to form pockets. Before folding decide which paper you would like to see as the cover and which side you want to see for the inside and pocket. Glue the four sheets of paper together to form a four page 6 inches x 9 inches mini album. Cut four 6 1/4 inches x 8 1/2 inches card stock and score at 4 1/4 inches to form booklets that can hold up to four 6 inches x 4 inches pictures. Cut four 6 1/4 inches x 4/1/4 inches card stock to form photo mats that can hold up to two pictures each. Decorate with the photo mats  and paper on front of album as desired with designer series paper. Take 2 inches x 9 inches piece of paper to wrap around and glue to form binding for the mini album.

Marvelous Monday Stampin Up Share What You Love Bundle

Oh my goodness I had so much fun over the weekend in the evening making lots of fun projects with the Stampin Up paper and stamp set Share What You Love! As you can see I have lots to share with you. Each day for the next week I feature one of the projects which include two page scrapbook layouts, cards in boxes and a purse, and mini albums. I look forward to sharing with you with what I love to do for relaxation complete with instructions! What do you think?

Fabulous Friday Seashore Mini Album


Supplies

Rubber Stamp Tapestry Lotus Pond

Rubber Stamp Tapestry Sunshine Puppies

Ranger Archival Ink Coffee

Ranger Archival Ink Buttercup

Ranger Archival Ink Emerald Green

Other Supplies

Black card stock

White card stcok

CTMH water color paints

Kaiser chipboard embellishents

I made this mini album following the tutorial found here: https://youtu.be/KrPiNNas-hg She has a wonderful step by step tutorial for the album. I watercolor the background for the two 4 x 6 images, colored the chipboard and stamped the images. What do you think of this min album?

Tutorial Thursday Heartfelt Creations Mini Album with B and D Inserts

Recently I joined Join Emma Lou in an online Heartfelt Creations class and followed her easy step by steps as she guided  through the steps of adding decorative papers using only one 12×12 paper pad along with decorative dies to make a mini album with inserts B and D.  The online class really took the mystery out of decorating a mini album and how easy it is to use decorative papers and embellishments to the album. The tutorial for this album can be located here: https://www.heartfeltcreations.us/shop/?tracking=5add3e34e7161

Here are the pictures from my album. What do you think?

Winner Wednesday Heartfelt Creations Mini Album Flipfolds and Pockets E and F

I work with a very motivated and fun group of ladies every week making a variety of paper crafting projects. Recently some of them mentioned to me that they were not sure what to do with the albums and flipfold inserts they had purchased. I decided to review The Beginner’s Workshop for Elegant Flipfold Albums: How to Add Flipfold Inserts that Emma Lou from Heartfelt Creations presented as an online class  that is available here: https://www.heartfeltcreations.us/shop/?tracking=5add3e34e7161  The online class provides easy step by steps  through the steps of adding interactive Flipfold & Pocket Inserts A, B, C, D, E, and F to your albums, along with how to add magnet closures. The online class takes the mystery out of these inserts and how easy it is to add Flipfold inserts to your Album, which all differ in design and come pre-measured and pre-scored making assembly quick and stress free, all while allowing varying combinations and designs making your album as unique as you are.

I created three sample albums to use as teaching tools with the ladies starting this week. This album showcases Flipfold and Pocket Inserts Eand F. What do you think?

Previous Older Entries